GitBlit安装
1. 安装
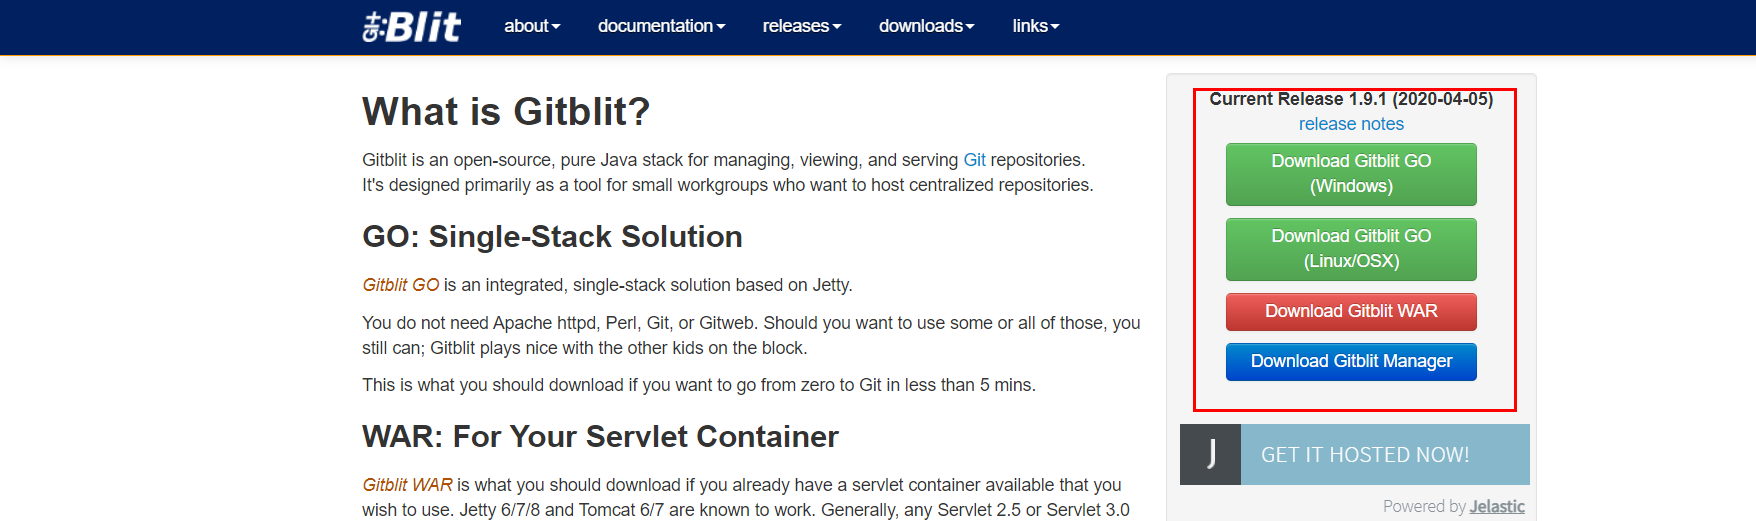
要求Windows电脑安装JAVA环境,在GitBlit首页可根据操作系统选择不同的版本安装。
2. 解压
文件下载后,解压至一个文件夹下即可,无需安装。下图是解压后的文件列表。
 3. 配置文件
Gitblit目录下的data文件夹中的defaults.properties是默认配置文件,另外需要修改gitblit.properties以覆盖默认配置。
server.httpPort:http协议端口号server.httpBindInterface:http服务器的ip地址
1 | # |
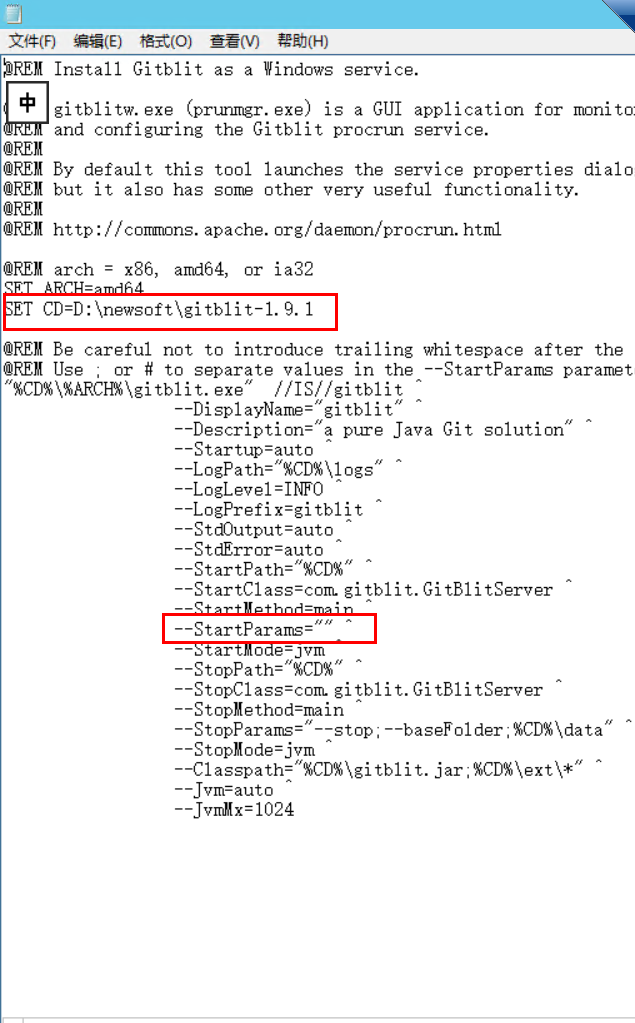
4. 服务启动
GitBlit目录下,在installService.cmd中。
- 修改ARCH,32位系统:
SET ARCH=x86;64位系统:SET ARCH=amd64。 - 添加CD为程序目录
SET CD=D:\newsoft\gitblit-1.9.1(安装目录)。 StartParams里的启动参数,置空
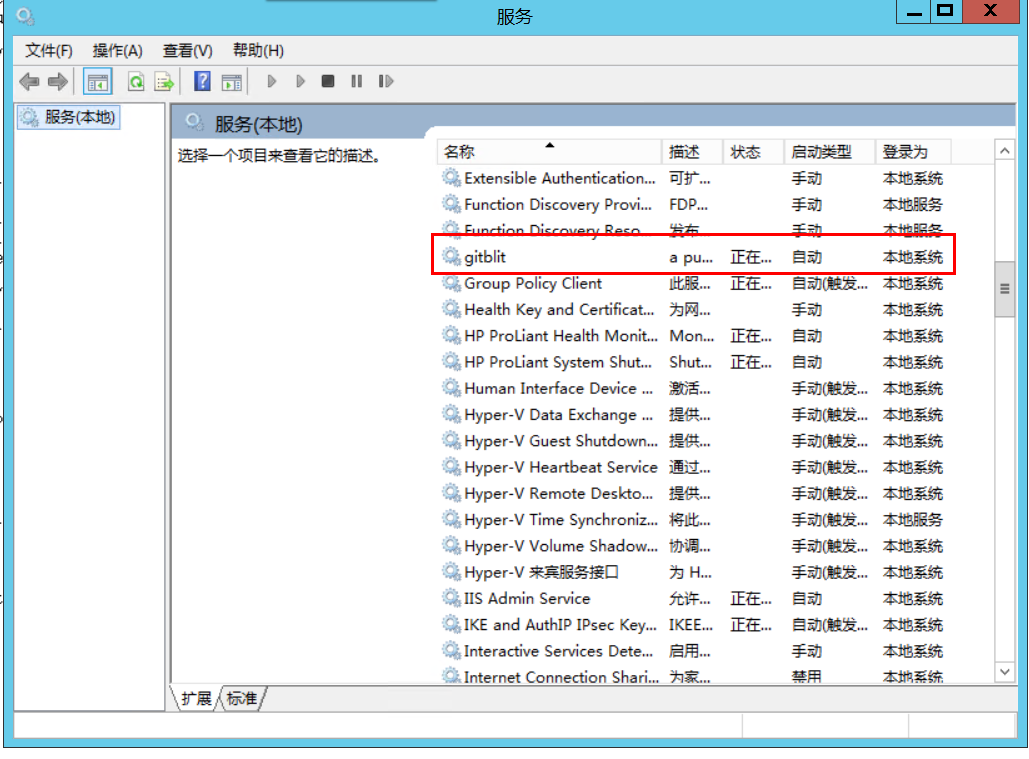
服务注册表中即可查看该服务,可重启、停止。
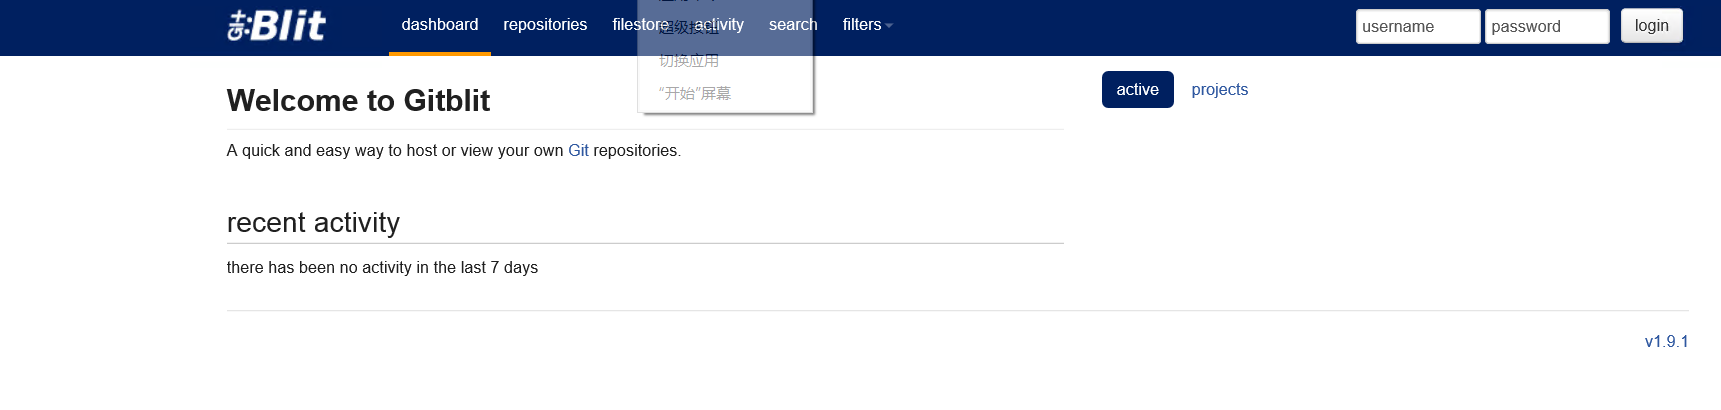
5. 浏览器访问
账号密码默认admin/admin
GitBlit简单使用
1.克隆仓库
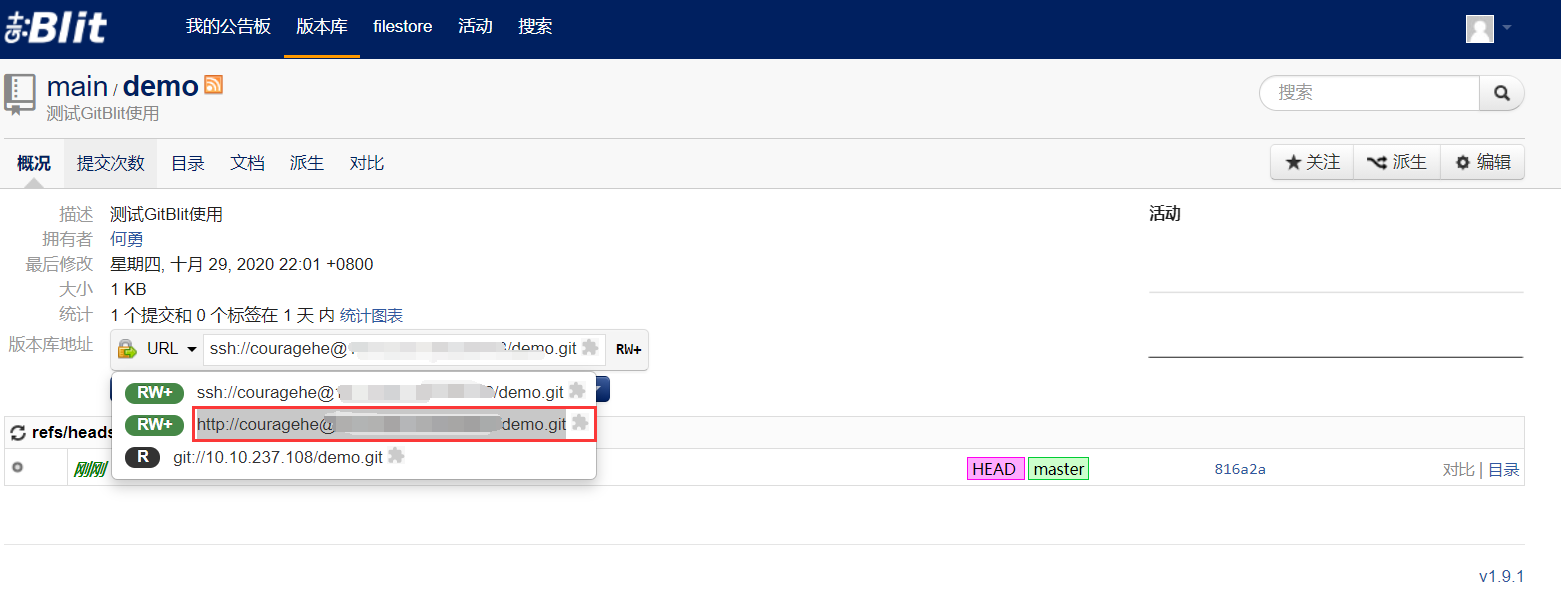
进入仓库概况页面,在版本仓库地址栏选择http协议的git链接,复制该链接。
选择本地合适的文件路径,打开cmd窗口克隆该仓库即可。
1 | git clone git clone http://couragehe@XX.XX.XX.XX:9999/r/demo.git |

2.账户认证
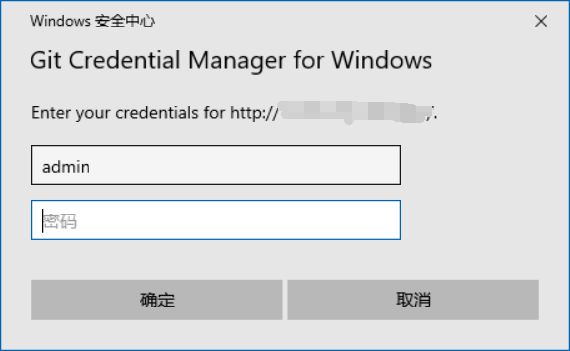
打开项目路径的cmd窗口,推送项目至远程git仓库,首次推送会弹出windows安全认证,输入密码即可保存至windows。
1 | git push |
3.分支问题
gitblit中没有创建工单(分支)的按钮,但并不代表不支持分支。做法便是将git仓库拉取至本地中,新建分支然后上传至远端仓库即可。
3.1 显示分支列表
1 | git branch |
3.2 新建分支
1 | git branch demo |
3.3 切换分支
1 | git checkout demo |
3.4 远程分支新建
在本地新分支下,推送本地分支至远程仓库中的分支(非强制要求同名),使用以下命令对应即可。其中第一个分支名demo对应的是本地分支名,第二个分支名demo对应的是远程分支名。
1 | git push origin demo:demo |
3.5 本地仓库分支关联远程分支
使用该句之前必须确保远程仓库存在该分支,否则报错。关联之后便可直接使用git push或者git pull进行推送或拉取,命令简单明了。
1 | git branch --set-upstream-to=origin/demo |